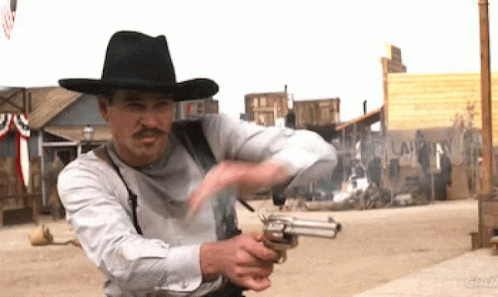
Ever wished you could shoot better?
Of course you do! Learning how to shoot your pistol accurately is more than just a matter of skill or pride–it’s also important for safety.
Fortunately for you, learning accuracy with your pistol is pretty simple, and Firearms Review is here to help (and you thought we were only about reviewing guns? Psshh.).
We’re going to walk you through a review of your shooting fundamentals, some easy exercises you can do at home, tips for proper range practice tips, and what gear we think you might find helpful.
Why Do I Need to Listen to You?
We know–who the heck are we to be telling you how you should be shooting?
Well, first, you should know that every member of our team has been there. We were all newbies, and since we’ve come from a variety of shooting backgrounds, we’ve got plenty of tried-and-true shooting tips, regardless of where you’re coming from.
You’re probably here because you’ve found out just how hard it is to shoot a pistol, much less shoot it well.
Anyways, the point is, we remember how it felt to not be able to hit anything, and we’re here to take you step-by-step through all the ways we found helped us shoot better. It might take a while, but by the time you’re done, you’ll be surprised at just how dang good you’ve gotten.
Shooting Fundamentals
When you want to improve your shooting, it never hurts to go back to the very foundation of shooting–the fundamentals. We’re talking your stance, your grip, your breathing, your trigger pull and reset, and your sight picture.
Even if you’ve been shooting for a while now, you may have picked up some bad habits or fallen out of the habit of properly following the fundamentals. We get it; we’ve had to fight off the newbie lean after a while away from the range, too.
So, let’s dive into all the building blocks of accurate shooting.
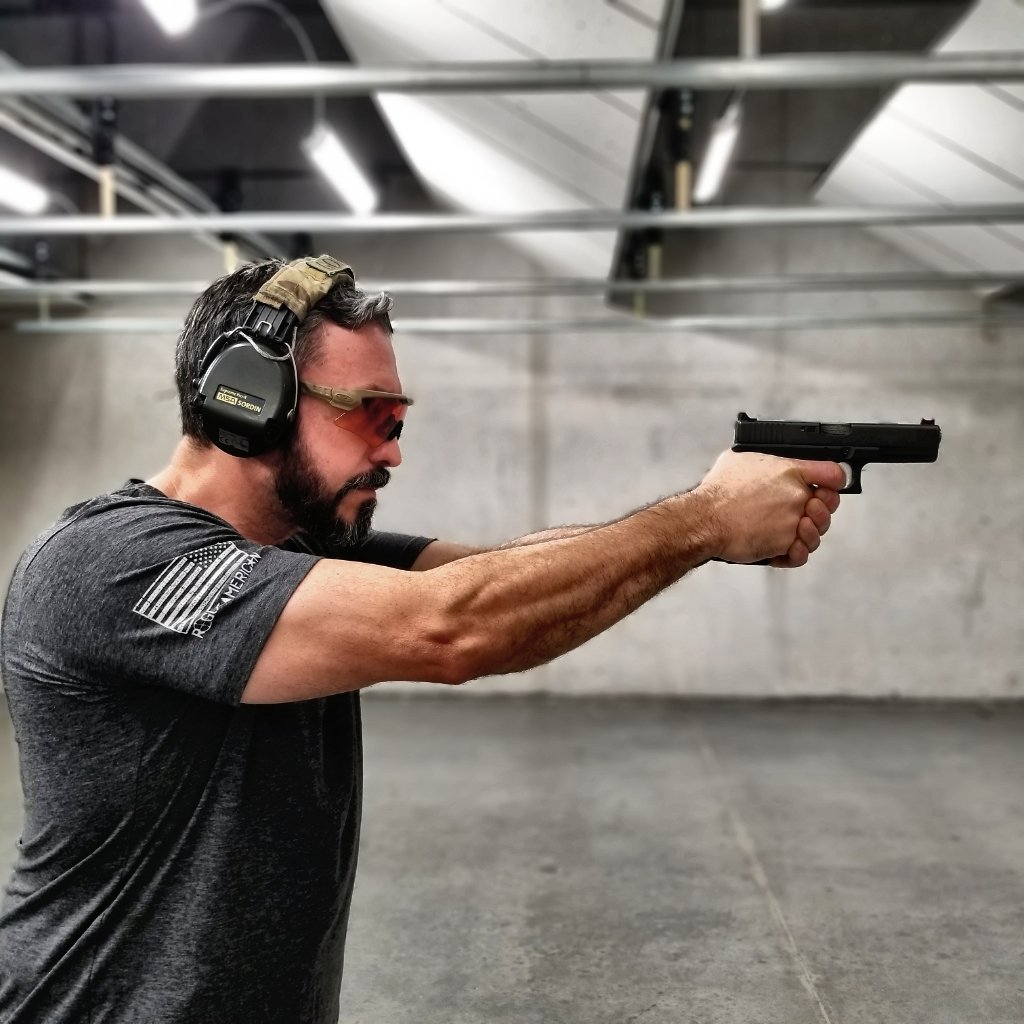
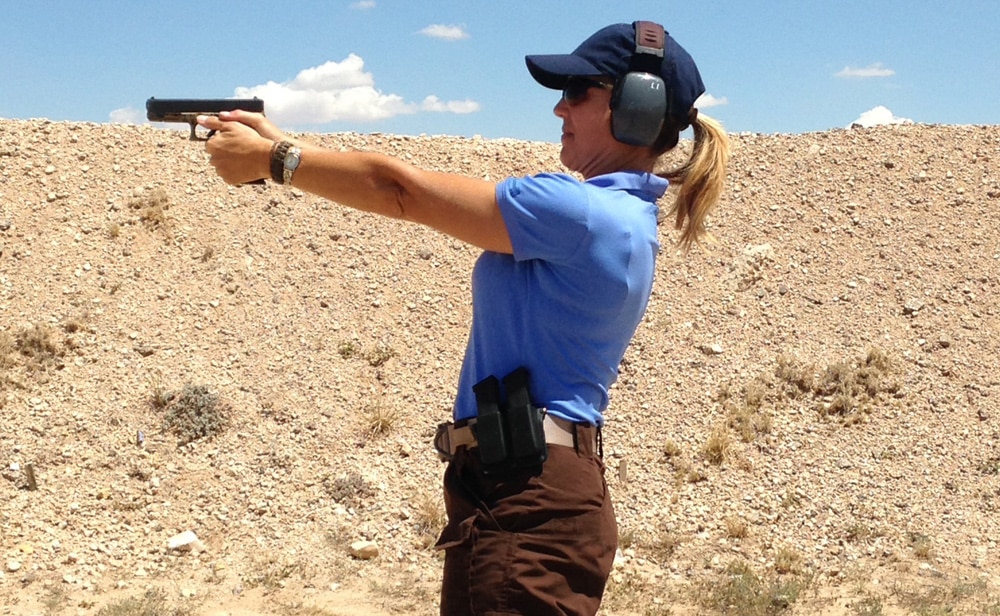
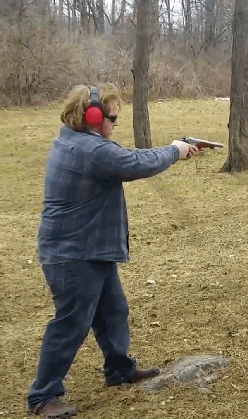
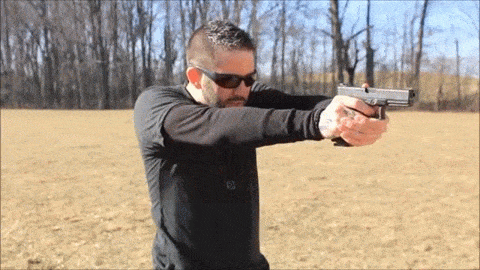
Stance
The way you stand while shooting is your foundation. A weak stance will make you ill-equipped to deal with recoil and will hurt your accuracy. After all, you’re literally holding a controlled explosion.
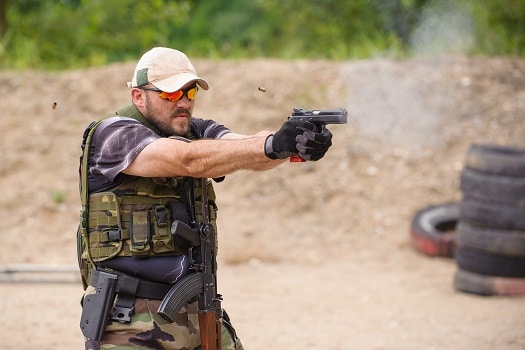
Firming up your stance will prepare you to manage recoil, prevent you from being pushed around, and will keep you from wobbling as you try to get on target.
Your stance’s priorities are comfort and stability. If you’re not comfortable, you won’t be able to hold it. If you’re not stable, it won’t do you any good.
Leaning slightly forward helps you manage recoil. Take a minute to think about the forces your pistol exerts after a shot happens. The slide moves backward and the muzzle rises. You’re dealing with backward and upward forces at the same time.

So how do you counter these forces with your body?
Easy–lean slightly forward. By leaning into the gun, your body is bracing the recoil so it won’t affect you as much. You’re creating a push against the force of the recoil, rather than leaning back and creating a pull in the direction of the recoil.
Spoiler: leaning back means you might topple over.
Now to get a little more technical, there are three main types of stance: Isosceles, Weaver, and Modified Weaver (sometimes called Chapman). All three stances are similar but have slight variations in where your feet are places and which arm is flexed.

What all three have in common is that you lean forward.
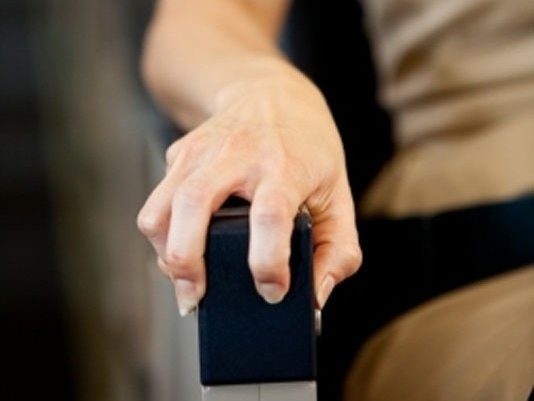
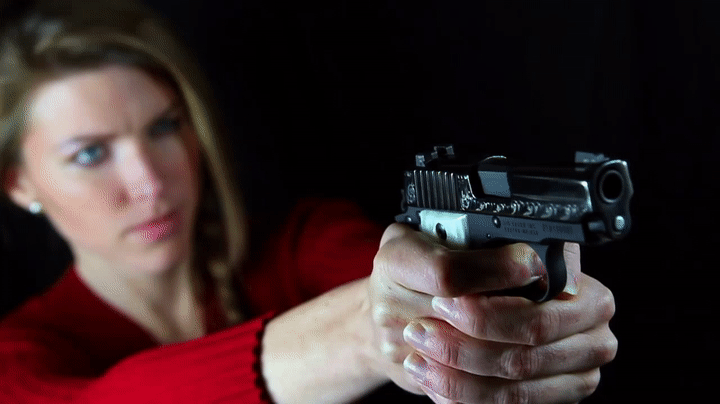
Grip
When you hold your gun, do you hold it like it’s a handshake–firm, but not crushing? Or do you hold it like it’s going to explode and the only thing that’s going to keep it from hitting you in the face is how tightly you’re hanging on?
We’d hope it’s the second option because that’s exactly what’s happening. When you grip your gun, you’re determining how stable it is going to be as it goes off, and it’s no time to be dainty about it.
The more crushing your grip is, the less your gun can move in your hand. Just be sure you aren’t white-knuckling it so hard you’re trembling, since that’s counterproductive.
on to your gun for dear life, but you don’t need
to have white knuckles.
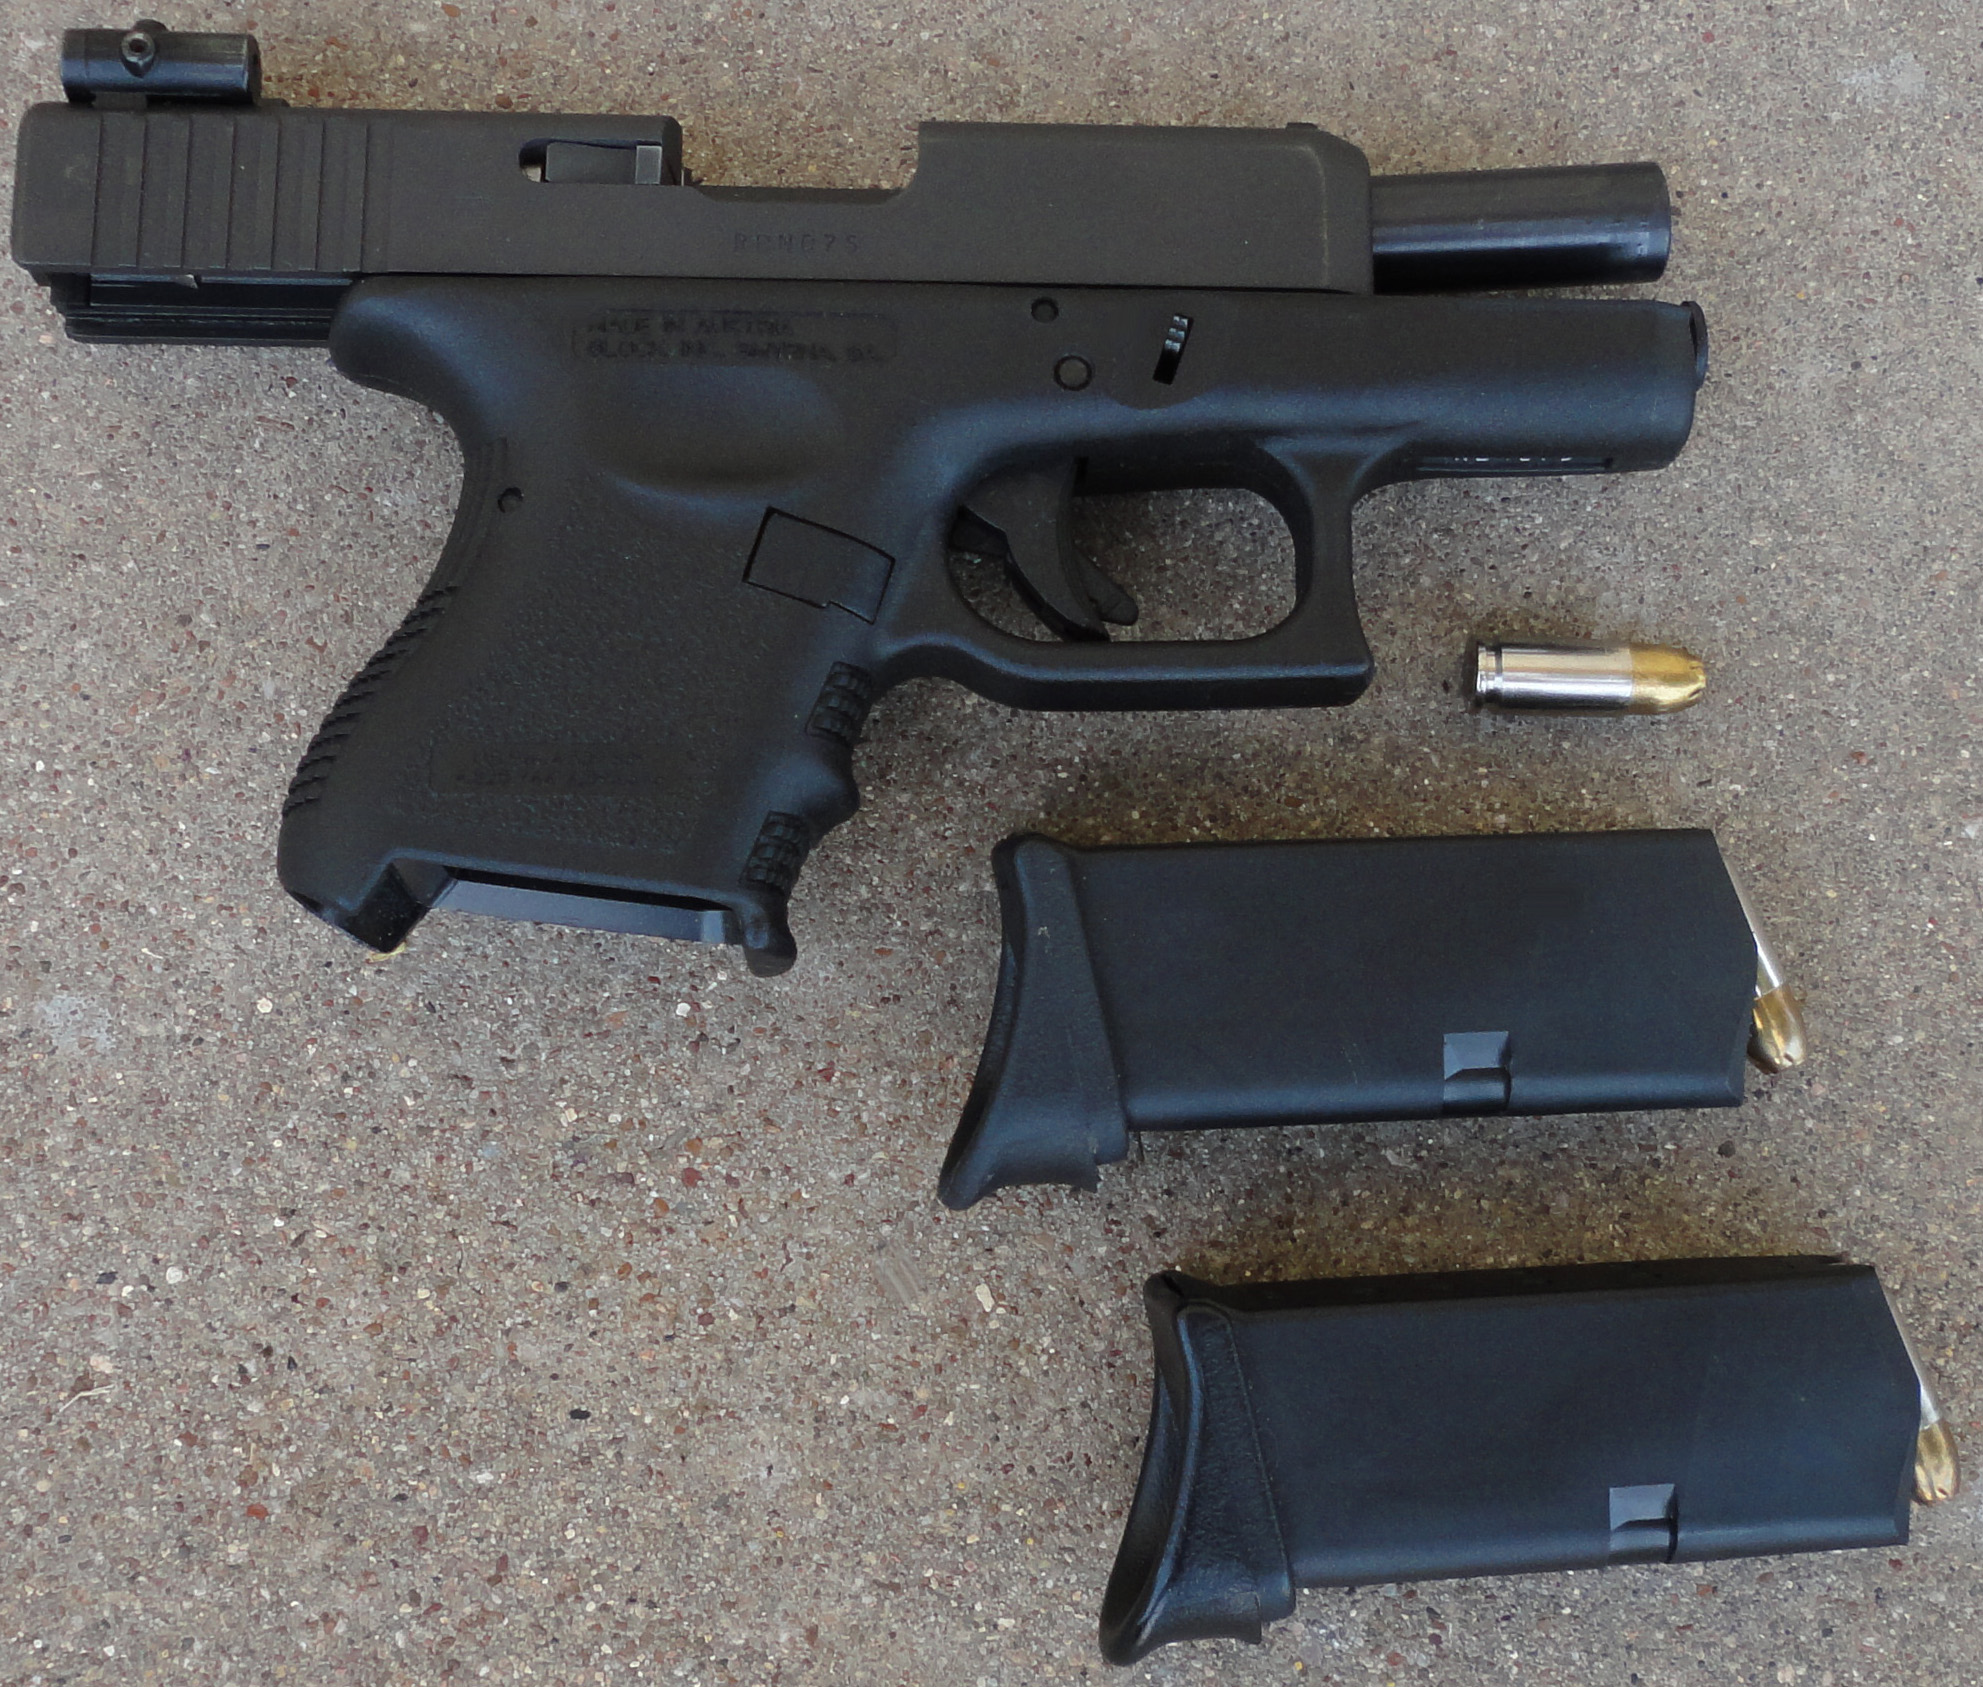
Not only is the strength of your grip important, but the way you grip your gun. There’s a bunch of ways to hold a gun, and about as many advocates (though, does anyone really advocate for the sideways gangster hold?), but there are a few basics you need to know as a beginner.
The web between your trigger finger and your thumb has a big role to play in accuracy. It should sit as high as possible on the grip, without getting in the way of the slide. A high grip like this will help contain the recoil of the slide as it moves backward
Your wrist should be aligned straight behind the gun, so the recoil shock travels up your arm. Picture a line that the slide travels along, and then put your arm on that line.
Got it? Cool! Now let’s talk about your other hand.
No, we’re not going to go all one-handed cowboy with it. Accuracy requires stability, and two hands are more stable than one.
If you look at the left-hand side of your gun (or the right, if you’re shooting left-handed), you should see a big ol’ empty space. You want to fill that space as much as possible with your other hand.
This will put your hand at a 45-degree angle to the slide, which you can check by extending your fingers and, well, taking a look at it.
Looks good? Then wrap those fingers over the top of your other fingers, squeezing tightly.
Thumb placement of your dominant hand comes down to personal preference, really. Some people like to point it downrange at the target, others will hold it up in the air. As long as it’s comfortable and out of your way, go for it.
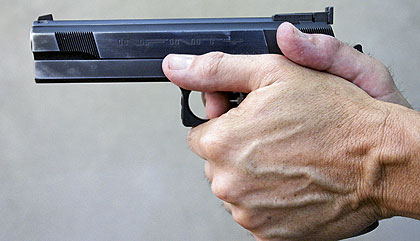
Your non-dominant thumb should lay along the frame of the gun, pointing forwards. It can feel a little weird, but it’ll ultimately affect the set of your wrist, and prevent limp wrists while firing.
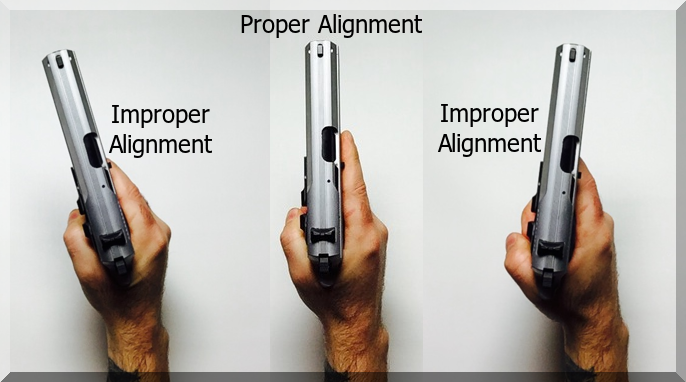
Sight Picture
Hopefully, you’ve been taught to focus on the front sight. If not, well, do that. That alone will make a huge difference in our accuracy, but of course, it’s not the only thing.
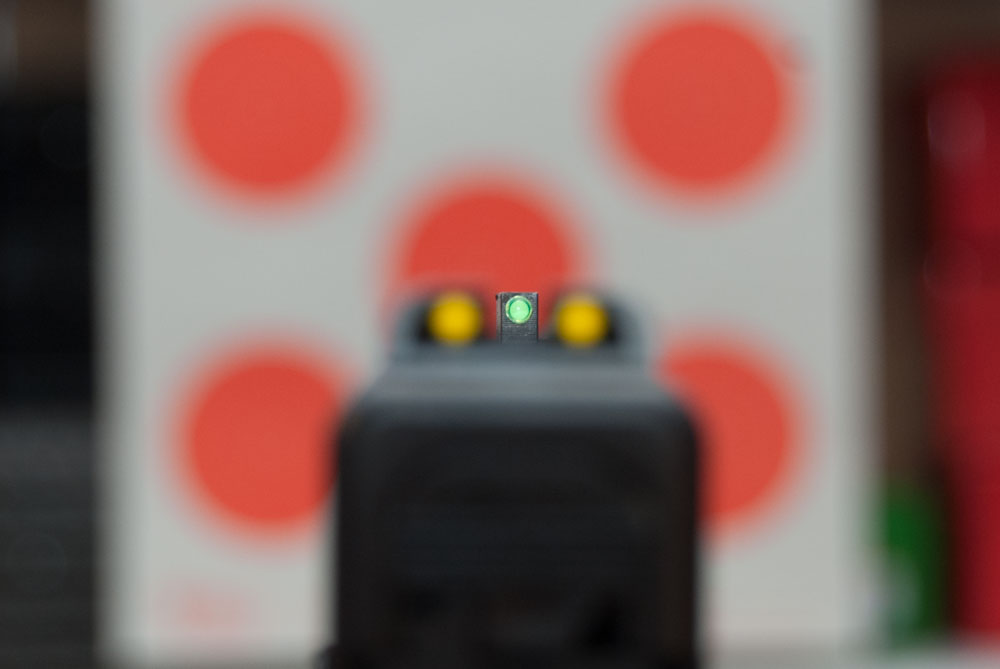
Do you shoot with both eyes open? If the answer is no, don’t worry–a lot of us started off closing one eye and squinting down the sights. Unless you’re seeing a lot of success this way (and if so, then why are you here?), try opening both eyes to shoot.
Shooting with both eyes has a number of benefits: reduced eye fatigue, better situational awareness, and increased accuracy.
The trick is just figuring out which of your eyes is dominant. Fortunately, there’s a pretty quick test for this.
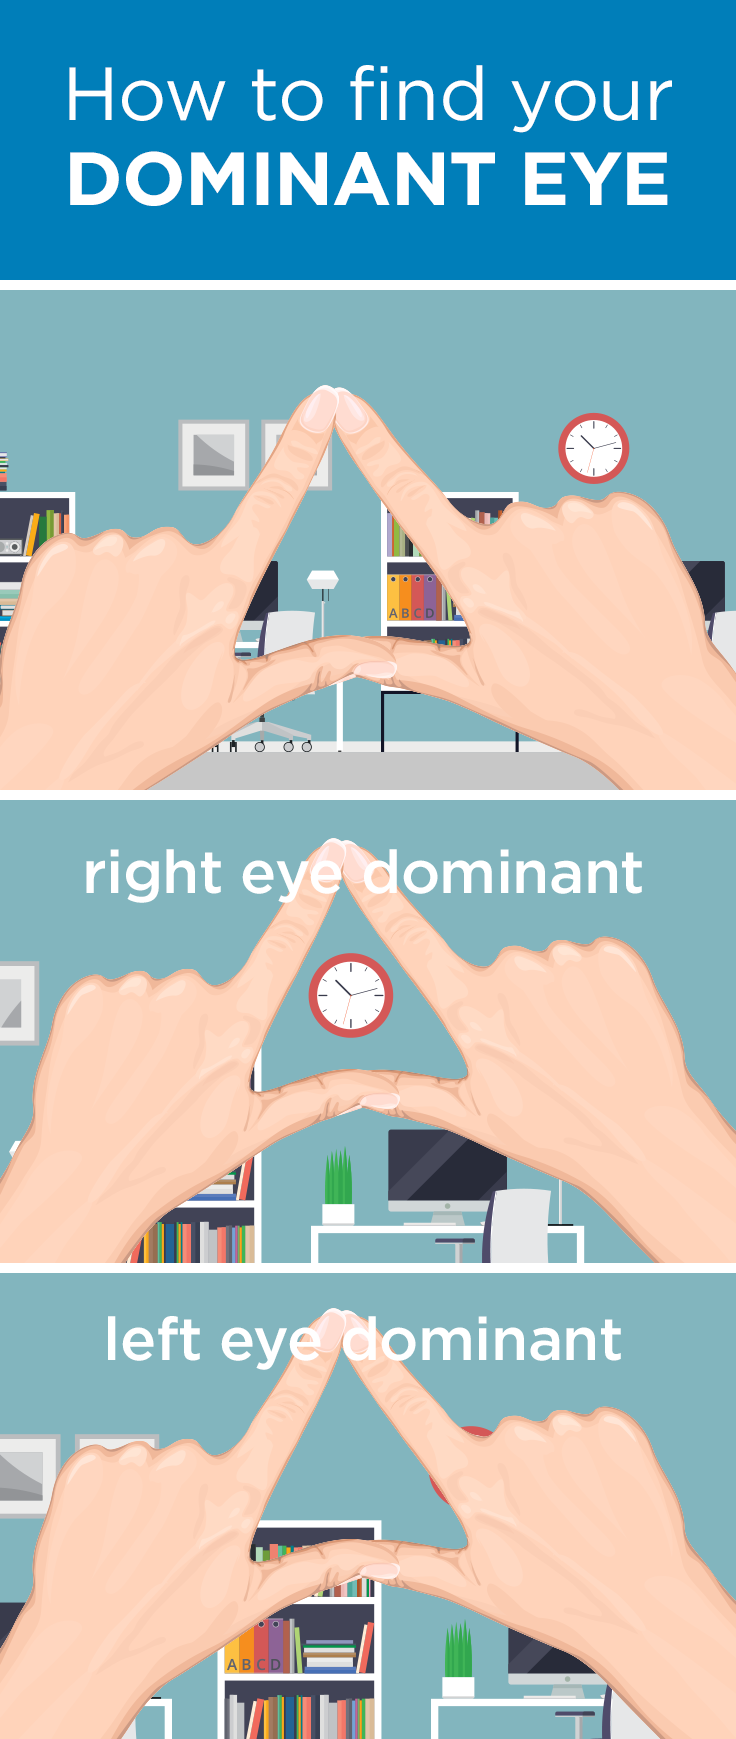
Hold both hands at arm’s length and make a triangle out of your thumb and fingers. Holding this triangle directly in front of your face, line up an object with the space, like you’re sighting in on it. Next, close one eye.
Is the target still in the space? If so, the open eye is your dominant eye. If not, your open eye is non-dominant.
Why is this important?
Lining up your sights with your dominant eye reduces the double-vision effect you can get when shooting with both eyes open and will keep you more accurate. When shooting Isosceles, this might be as simple as a small shift, or you may already be in line with Weaver (best for a dominant eye on the same side as the dominant hand) or Chapman (best for cross dominance).
Trigger Pull and Reset
Now that you can hold your gun on target perfectly, it’s time to make sure it stays there while firing.
The way you pull your trigger can drastically alter your shot. In case you haven’t heard it before, squeeze the trigger–don’t yank. You want to practically surprise yourself when the shot breaks.
If you’re jerking your trigger, you’re adding too much motion to your shot, and you’ll be off target before the trigger even breaks.
The slower you can pull the trigger, the better your shot will be. Let’s say that again–the slower you can pull the trigger, the better your shot will be.
Pulling the trigger well relies on more than just the speed with which you pull it, though. The position of the trigger on your trigger finger also is important.
If the ideal pull is straight back with nothing moving but the first two joints of your trigger finger, the best trigger pulls you’ll manage will happen when you find the sweet spot on your finger that allows for it.
Again, it comes down to personal preference and the size of your hands, but the trigger should rest somewhere between the top quarter of your fingertip and the first joint. What you’re looking for is the sweet spot mentioned above.
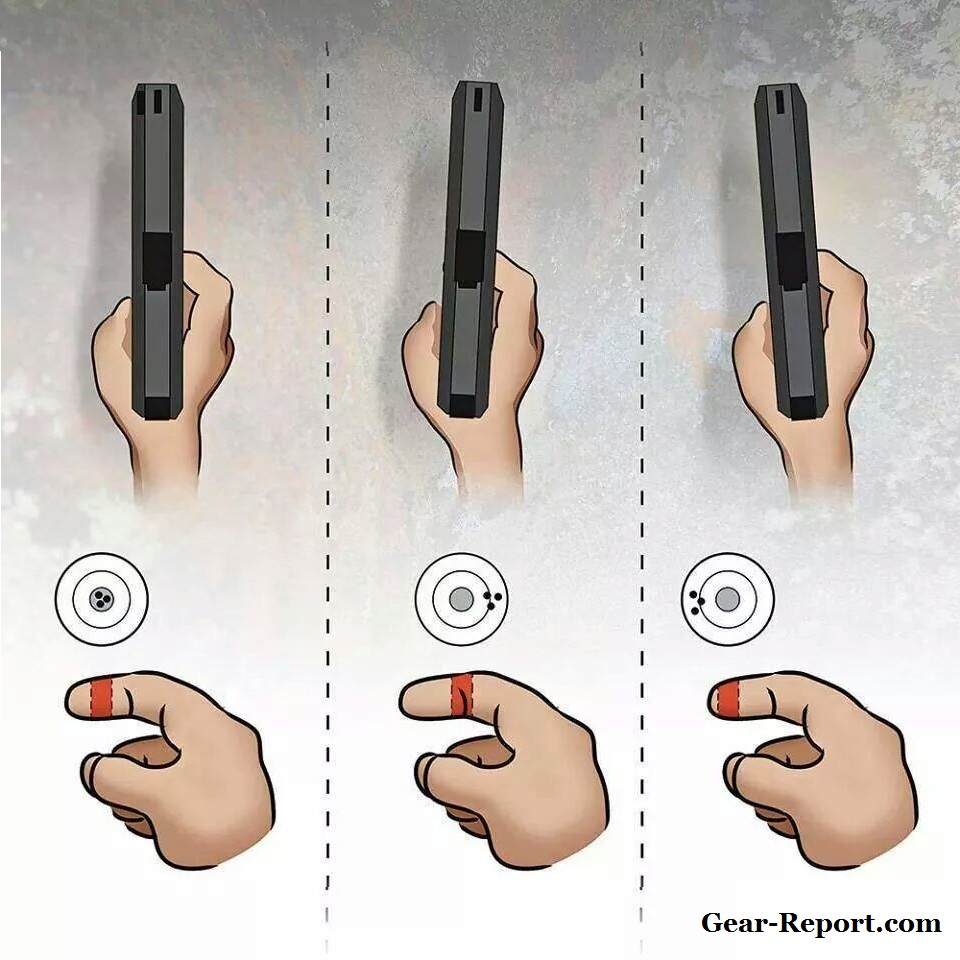
and throw off your shots.
If you’ve squeezed your trigger just right and sent a round downrange, it can be easy to immediately lift your finger off the trigger and look at the target.
Don’t worry–the hole will be there in a second, but lifting your finger off the trigger quickly is setting you up for bad habits and more work later on. If you’re jerking your finger off the trigger, chances are you’re also shooting too fast and jerking the trigger or moving the gun too much.
You’re also just making more work for yourself by releasing the slack in the trigger. You’ll have to keep making the same long pull with every shot because you’re resetting the trigger completely.
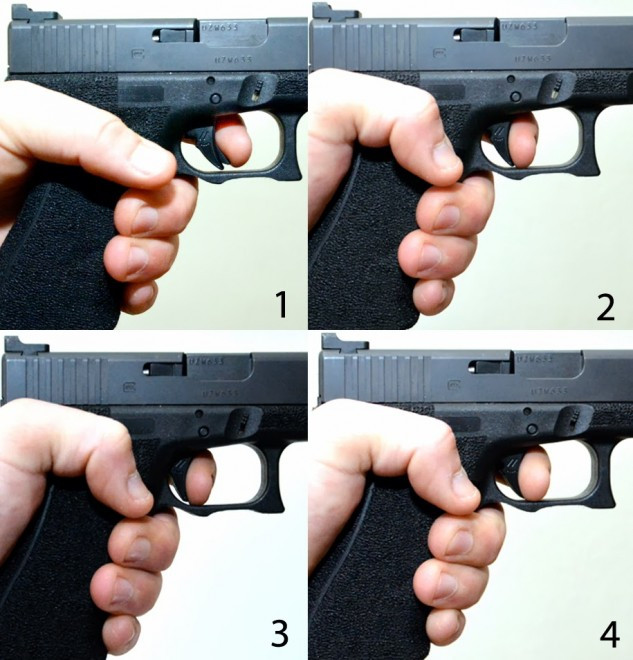
Accuracy is about control, and that means you need to practice a nice, controlled follow-through.
A proper trigger reset means you’re pulling the trigger all the way until the shot breaks, and then slowly lifting your finger until you feel the reset click, which signals that your trigger is ready to fire again.
By stopping just after the trigger resets, you’ve saved yourself the effort of taking up the slack in the trigger, and now all you need to do is squeeze slightly to fire again.
Breathing
Does all the advice out there on breathing make you dizzy?
We get it, and we’re here to remind you that you’re not sniping at 1,000 yards, planning your shot around your breaths and heartbeat. You’re shooting a pistol.
Holding your breath will mess you up after a while, so we recommend breathing naturally. It won’t make a huge difference if you breathe during a shot.
If you want to control your breath, then take a breath, let half out, squeeze the trigger, and let the rest out as you reset the trigger.
Dry-Firing Exercises
Probably the most helpful exercise out there for new shooters, dry-firing lets you pull the trigger on a cocked handgun and let the hammer drop on either an empty chamber or a dummy round. It builds muscle memory, develops good habits, and helps you learn the feel of your gun.
Best of all?
You can do it at home!
Is Dry-Firing Safe for My Pistol?
You may have heard it isn’t, without ever knowing why or why not. The truth is, dry-firing won’t harm your handgun, as long as you know how to do it properly.
Centerfire pistols (shooting 9mm, .40 S&W, .45 ACP, etc.) can dry-fire all you want without a concern because the striker pin isn’t actually hitting anything. Rimfires, like .22LR, do require a little extra care.

Because the firing pin hits the mouth of the chamber when dry-fired, you’ll want to make sure you do have a cartridge in the chamber to absorb the hit. Snap caps are specially made for safe dry-firing practice with a rimfire handgun.

We really like them for some other exercises, so it might be worth picking up a pack.
Why Do I Need to Waste Time Dry-Firing Instead of at the Range?
We’re so glad you asked. The point of dry-firing is to develop muscle memory so you can consistently pull your trigger well and won’t flinch when it’s time to shoot for real. It’s also a good way of correcting bad habits and keeping you from acquiring them.
Dry-firing is a great way to keep your skills sharp if you can’t make it to the range often, but that doesn’t mean you should only use it occasionally. Dry-firing for a few minutes a day, every day, will teach you all the nuances of your gun and trigger, just how to grip, and how to stay nice and steady.
Shooting accurately is a skill that is constantly diminishing, and dry-firing is one way to help you keep it up-to-date, even if you’re going to the range often. You’d be surprised at the amount of improvement you’ll see with regular dry-firing practice.
Best Way to Practice Dry-Firing
Ready to learn how to dry-fire?
First off, you need to make sure that your gun is actually unloaded. You should always verify that a firearm is unloaded before you do anything else–even if you know it’s unloaded because you just checked it a minute ago. Do it. Build good habits.
You also should follow the 4 rules of shooting safety (even with an unloaded gun):
- Treat every gun as if it’s loaded, even if you checked it (and don’t allow live ammo in the same room).
- Never point the muzzle at anything you aren’t willing to destroy (always point in a safe direction).
- Keep your finger off the trigger until you’re ready to shoot.
- Always be aware of your target and what is behind it.
These safety rules apply to every firearm, in every situation, and following them any time you’re handling a gun can prevent an accident from occurring. So what do these rules look like during dry-firing?
First, check your weapon every time you pick it up, even if it is just between strings of dry-firing. You know it’s empty, but building that habit is worth it.
Second, establish safe targets to aim at. Maybe you’ve set up targets in your back yard. Maybe you’re just aiming at the doorknob. You’re definitely not aiming at your annoying roommate, no matter how tempting it is.
When you’ve sighted in and you’re ready to dry-fire, place your finger on the trigger and squeeze slowly. Painfully slowly. Slower than you’d ever do at the range. Once you’ve got that down, you can work on speed.
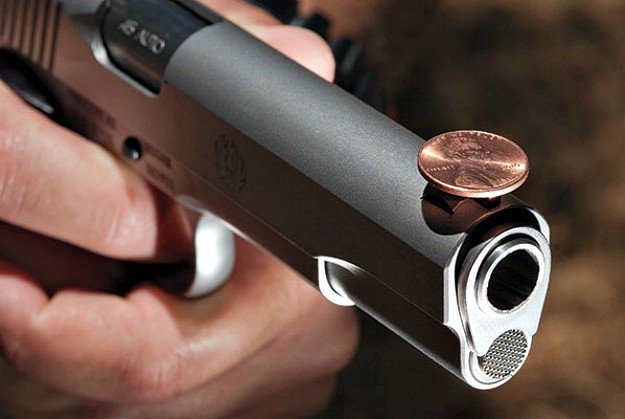
Want a great way to make sure that your sights aren’t moving while you’re practicing? Balance a small coin on top of your front sight. If it falls, you know you’re moving your gun. Practice until it doesn’t fall anymore.
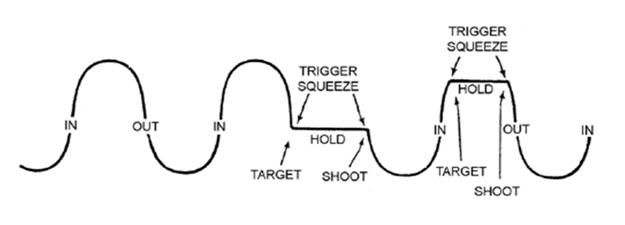
Don’t forget to practice both types of trigger pulls–full (with the slack) and trigger reset pulls. To practice trigger reset pulls, leave the trigger depressed fully after your first shot, and use your nondominant hand to rack the slide.
Depending on your gun, you may have to rack it all the way back, or you may only have to rack it a half-inch or so. After you do that and you’re back in your two-handed grip, allow the trigger to release just far enough to hear the reset click, and shoot again.
Practicing both forms of trigger pull prepares you for making follow up shots after your inital shot. If you’re firing only one or the other, you won’t be ready for making shots you haven’t trained for
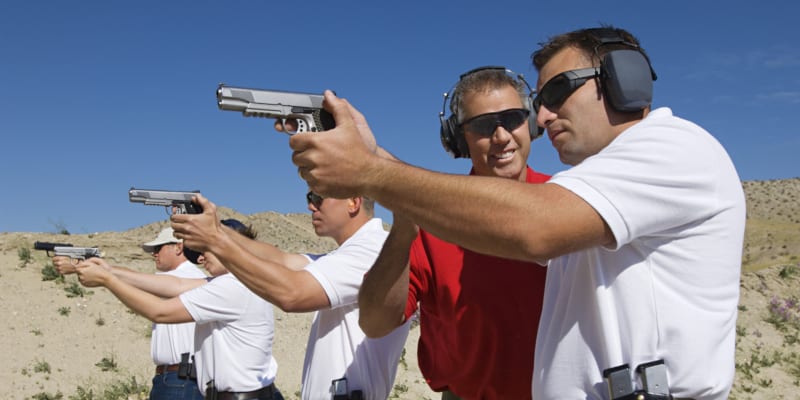
Range Time
Now for the fun part–range trips! Truth be told, too much range time in the beginning can be bad for your shooting. You haven’t built up the muscle memory of dry-firing and you’re developing a flinch reaction, which is only natural.

If you skipped dry-firing time and are looking to go back and learn the right way, don’t worry. You can untrain yourself from all your bad habits with practice.
When you get set up at the range, take a minute to dry-fire a few rounds before loading up live ammo. This gets you back in the right headspace and ready to make good shots.
We like to start off at somewhere around 3 to 5 yards, since that helps control for a lot of the factors that could affect your shooting besides… you.
Dialing in your accuracy takes getting to know your gun and your shooting habits. A good place to begin is from a supported position to establish a baseline to compare yourself against. You can sit at the bench and rest your elbows on it, or lean against the bench, while shooting to stabilize you a little more.

Below is a chart that translates your hits into what mistake you’re making. If you’re a southpaw, you’ll need to mirror the chart. After a couple of shots, you can compare your actual hits to the chart to diagnose what you’re doing wrong.
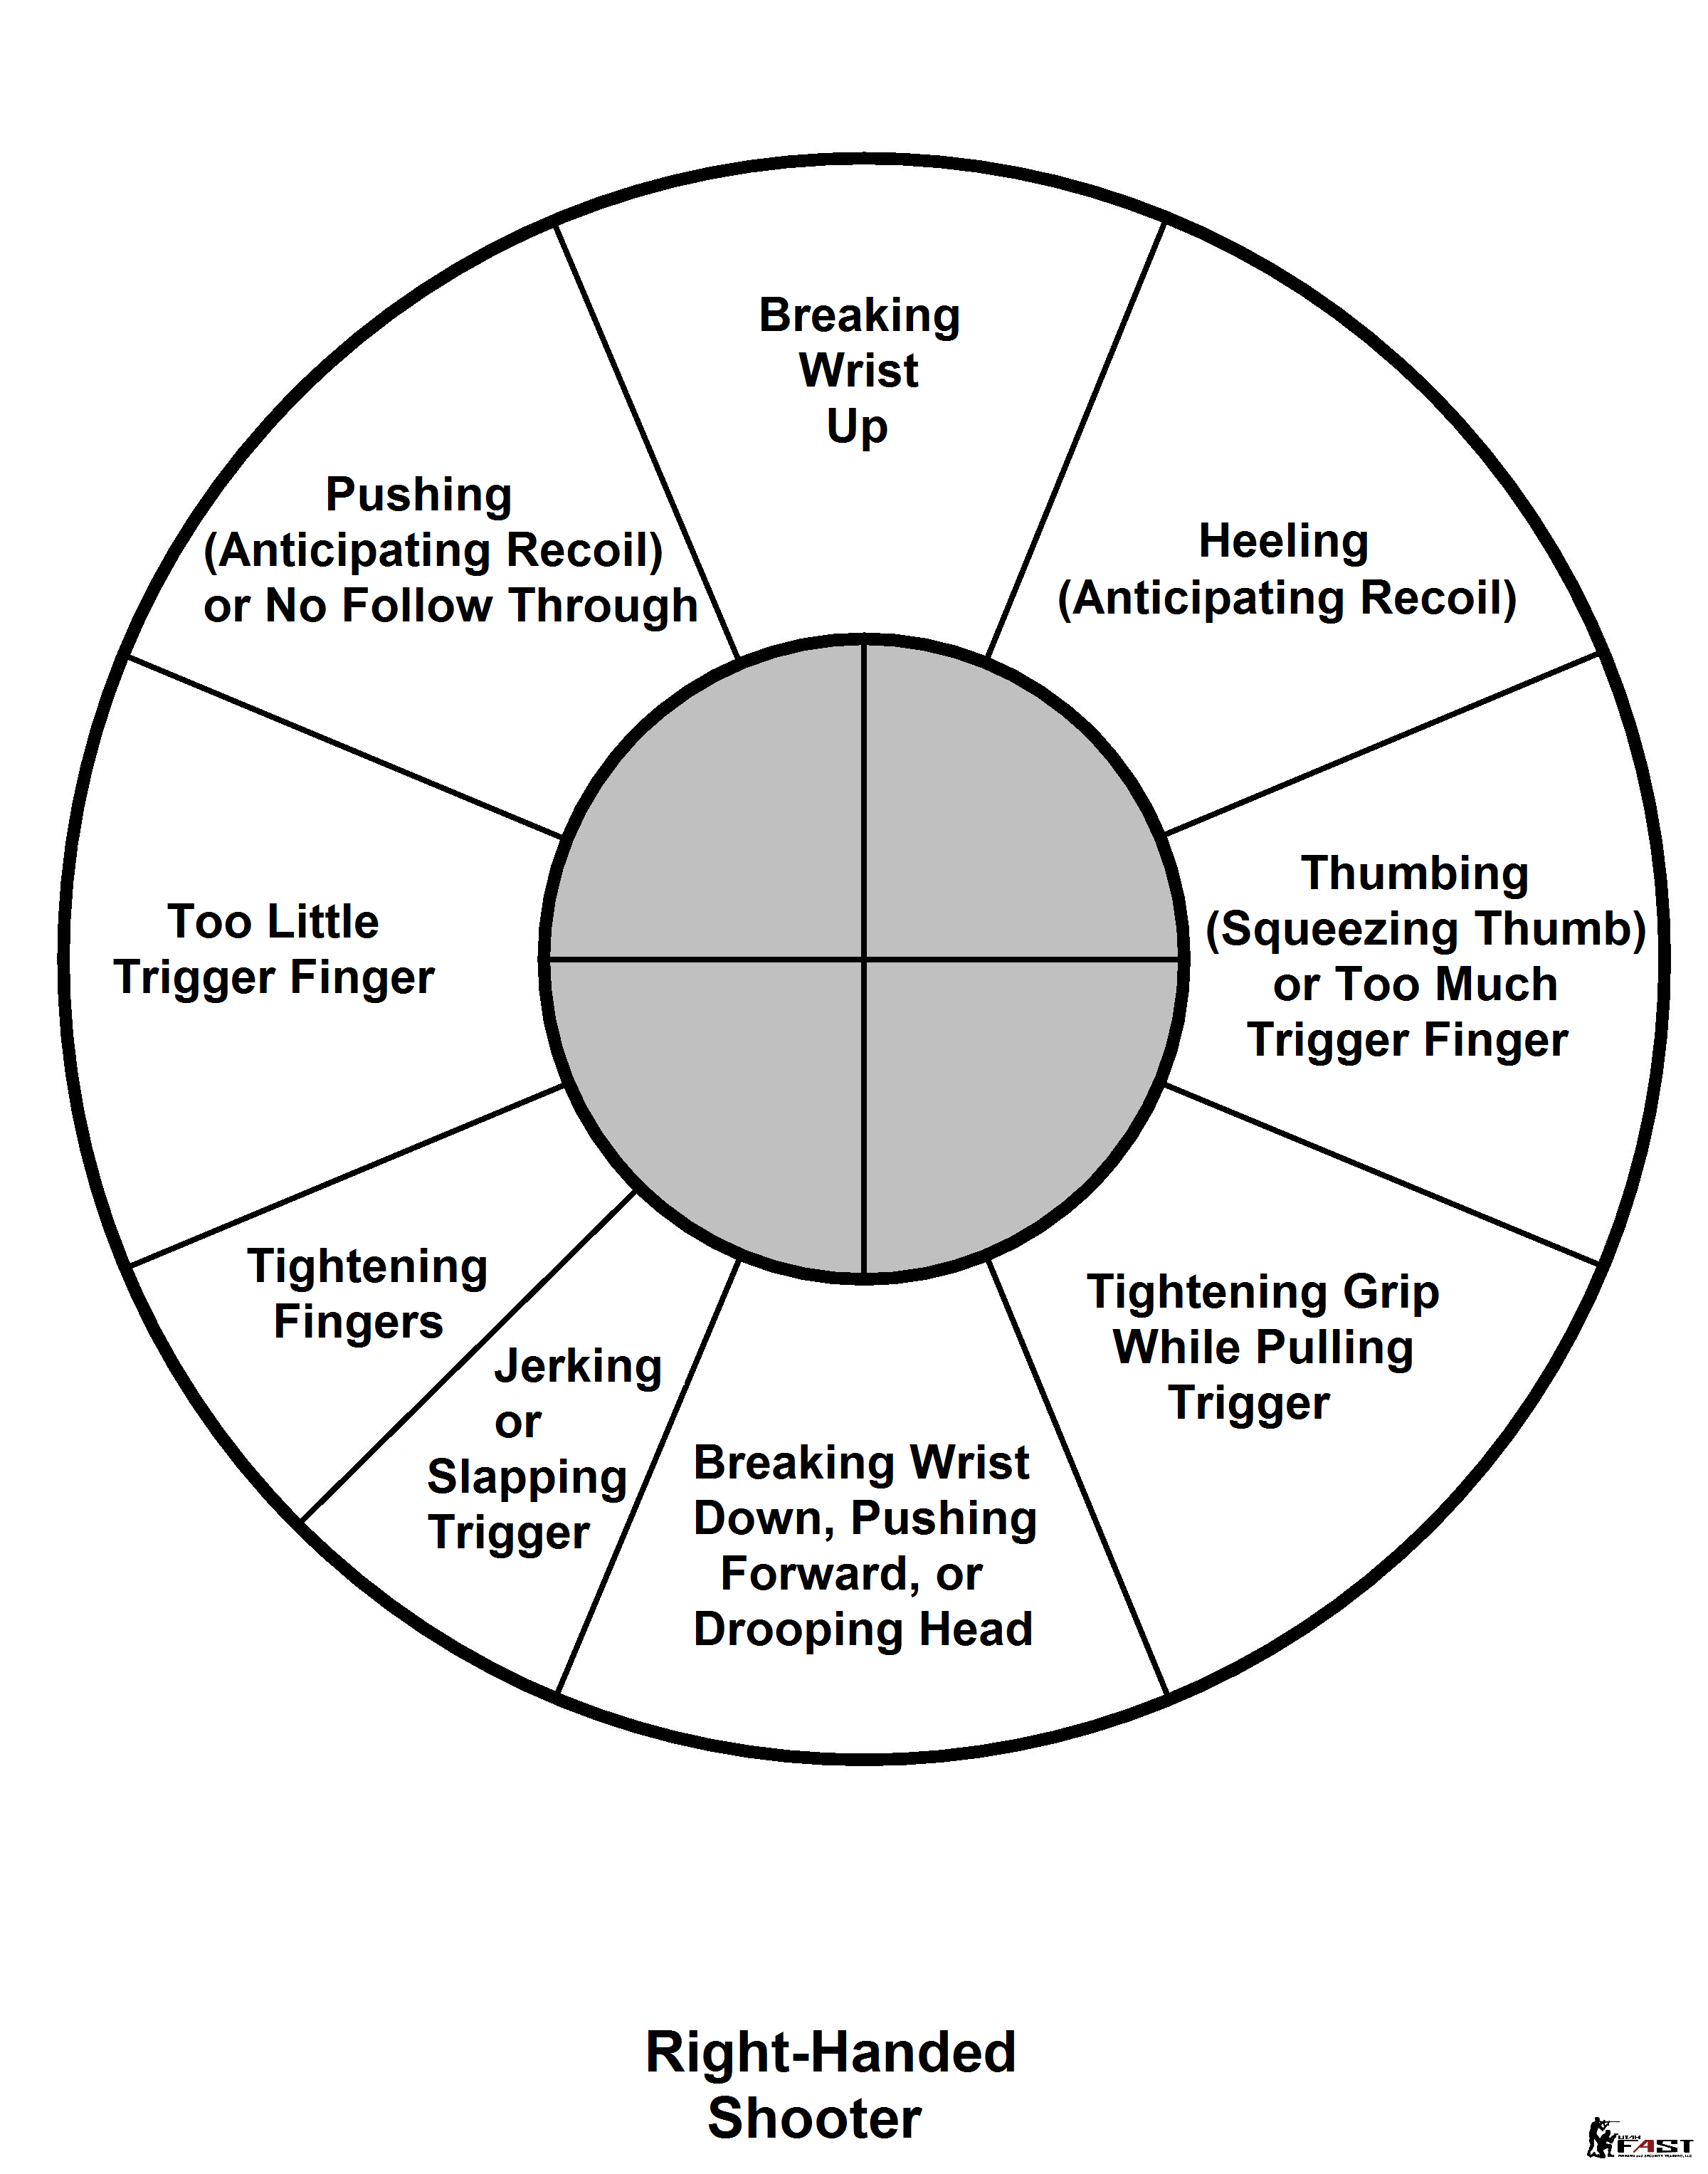
If you’re all over the target, you don’t need the chart to know that your grip on the pistol is inconsistent.
Do you find that you start off strong, but the more you shoot, the worse you get? Fatigue is one factor, but it’s also possible that you’re just slipping back into old habits. Don’t be afraid to remind yourself to slow down, squeeze, breathe, and get back into your lessons.
Live or Not Range Drill
If you have a buddy with you at the range (or a really patient significant other) ask them to load a random mix of live ammo and snap caps into your magazine without you knowing what the order is.
reaction–just be sure to treat every round as live!
This drill will show you if you’ve developed a natural flinch, since you’ll visibly flinch when you reach an unexpected snap cap and it doesn’t go bang! It’ll be pretty clear just how you deal with recoil after that.
Don’t forget that dry-firing is great for building good habits but there isn’t any recoil to deal with so you will shoot differently when firing live ammo. You may notice a pattern in how you flinch as you keep shooting and get to know your quirks.
Shooting Gear
We love gear and gadgets here at Firearm Review, so it shouldn’t surprise you that we have some recommendations for great tools to help you improve your shooting.
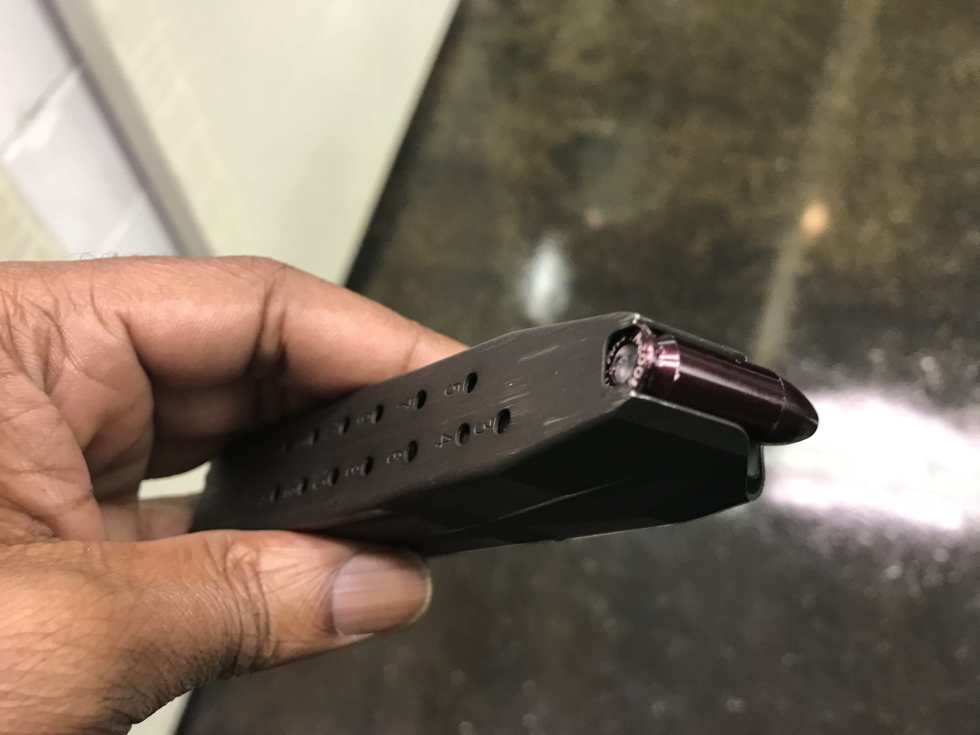
Snap Caps
We mentioned them above, but didn’t get into too much detail. Snap caps are hard anodized aluminum dummy rounds, which feed and function much like a real round–except they don’t go off. They’re an essential for rimfire firearms, but also come in a variety of calibers for you to choose from–great for practicing reloading or shooting drills.
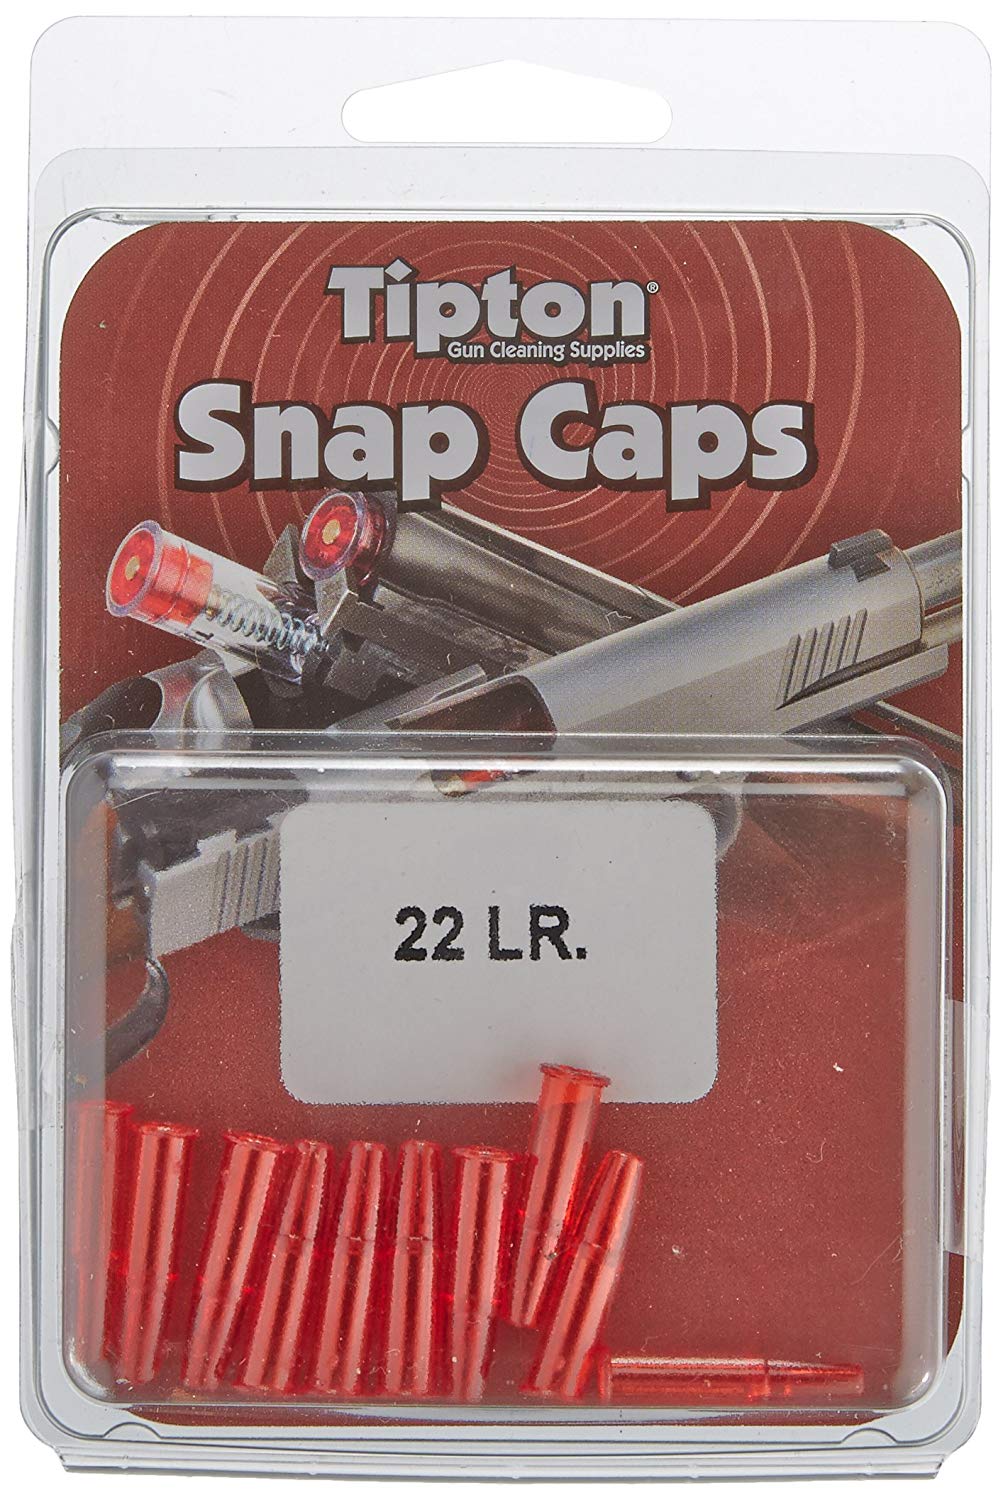
Snap Caps .22LR
Pros
- Protects your gun from damage during dry-firing
- Hard anodized aluminum
- Variety of calibers
Cons
- Rimfire guns dent the end of the cap
Laserlyte
For those of you who want to see where it is you’re hitting while dry-firing, the Laserlyte is the tool for you. It’s a device that looks a lot like a dummy round, but when the firing pin strikes it, it shoots a laser beam down range. Paired with a laser-detecting target or two, and you’re ready to practice competitive shooting moves like target transitions.
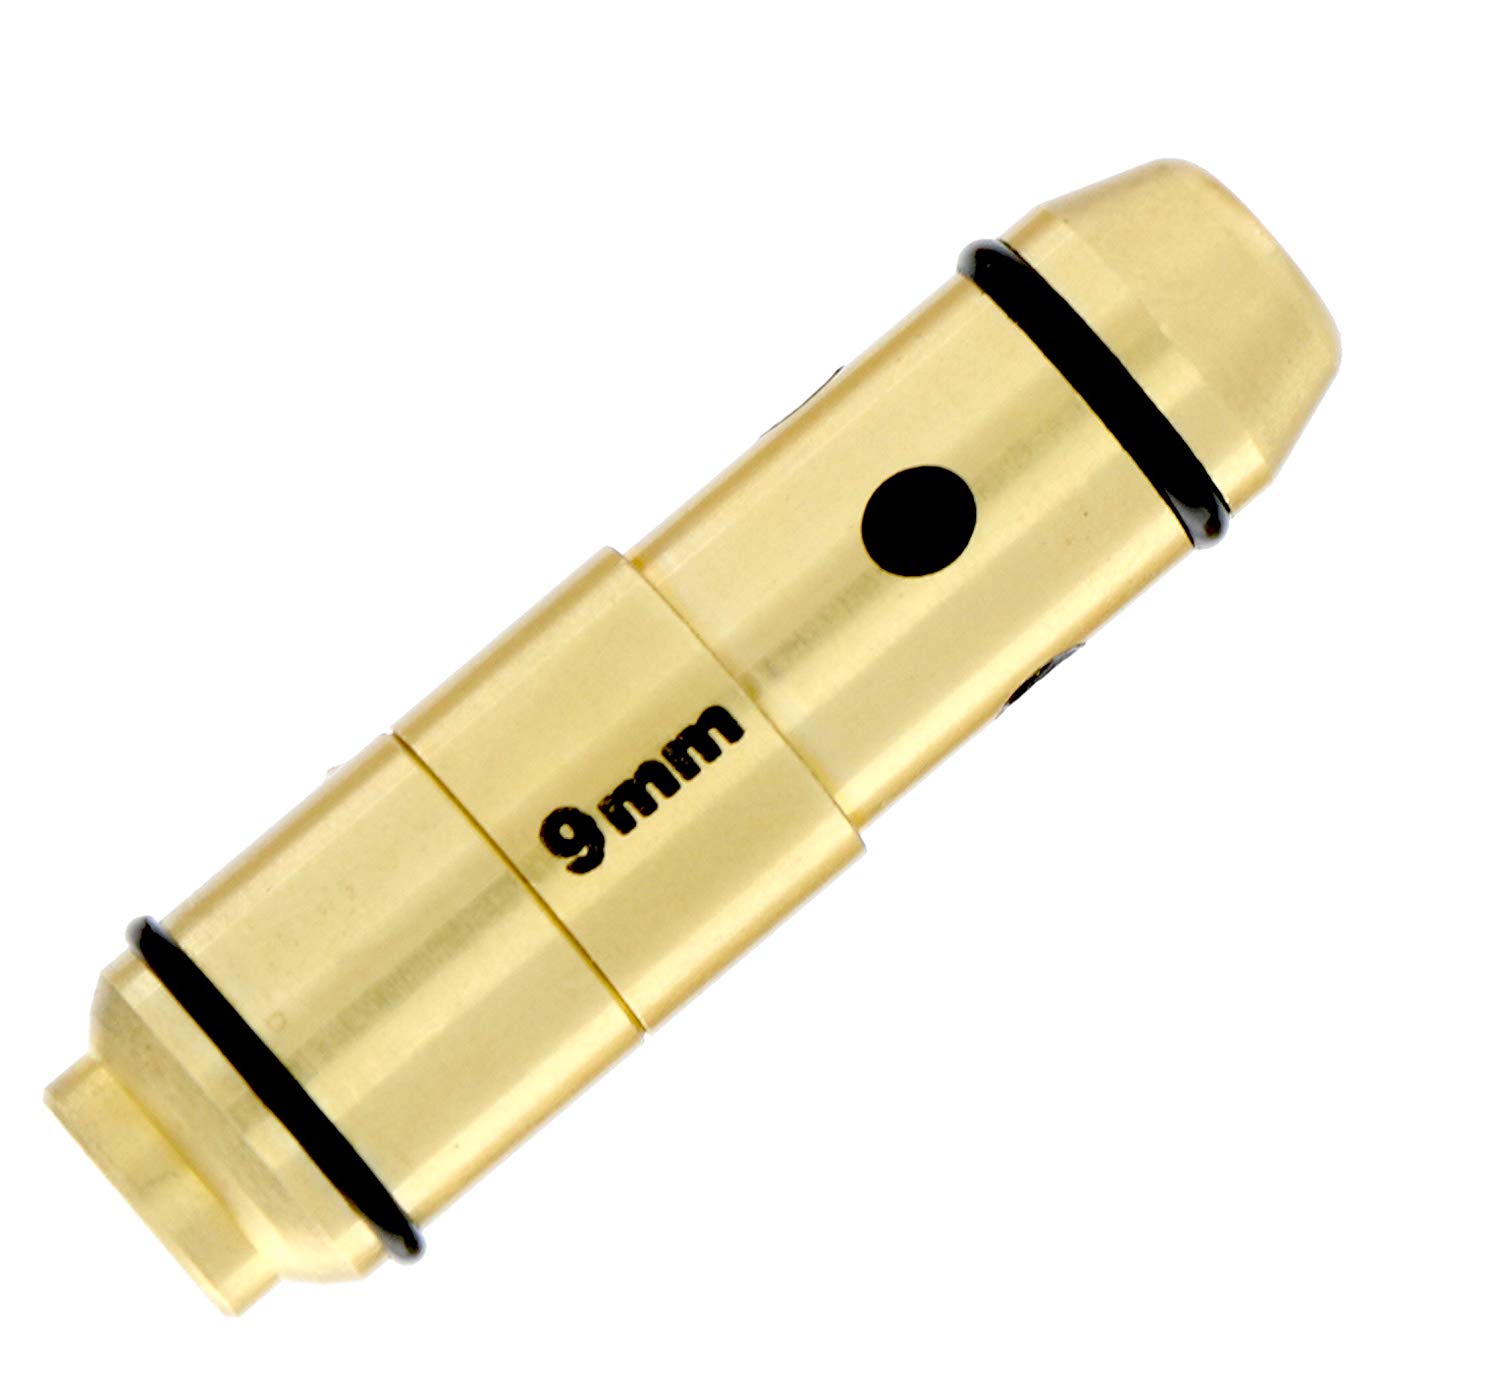
Laserlyte 9mm
Pros
- Helps you see where you're hitting while dry firing
- Pairs with laser targets
- Great visual firing trainer
Cons
- Expensive
We’ve also found it’s a fun way to get non-shooters more interested in accompanying you to the range.
Shoot N’ C Targets
There’s a variety of targets out there that function like Shoot N’ C targets, but we’re fond of these ones. They have sticker targets you can put over paper targets which show color when you hit the target. They’re really easy to see at a distance, it’s a lot easier to tell if you’re actually improving or not.
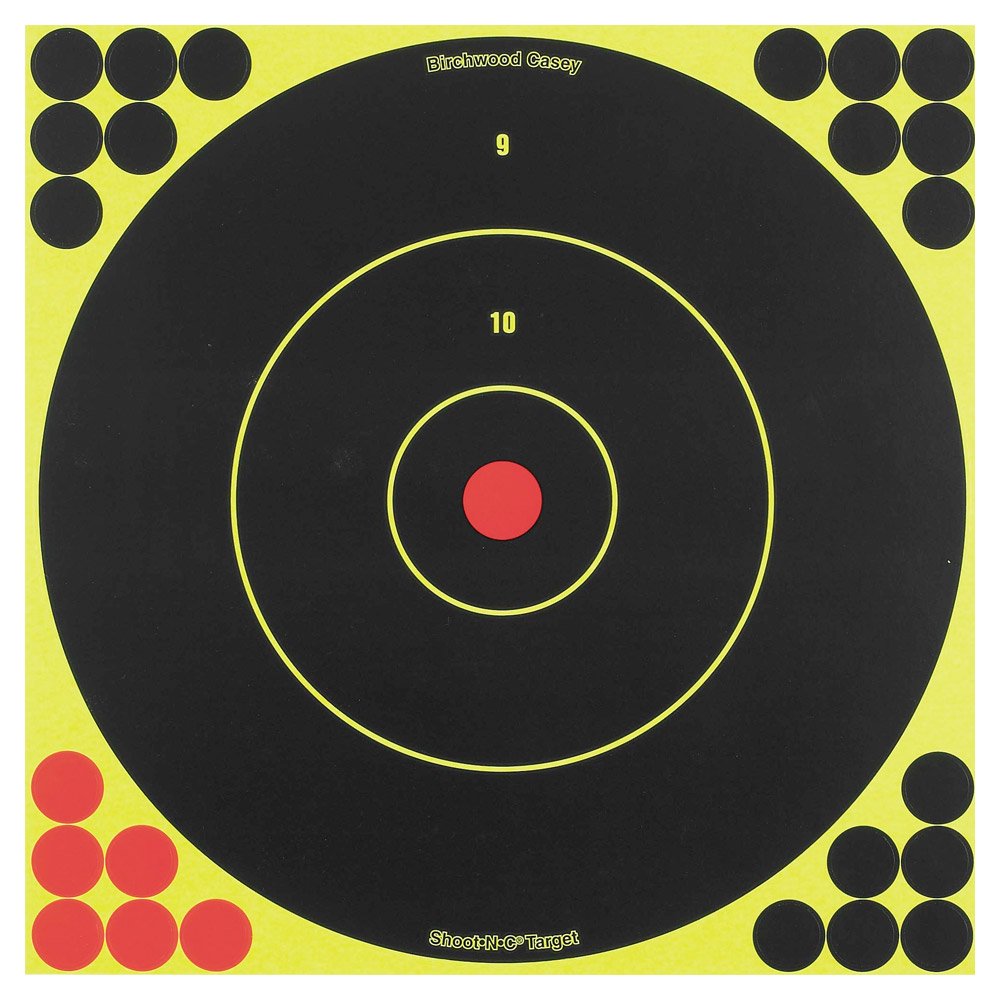
Shoot N’ C Targets
Pros
- Makes shots easily visible
- Helps you track your progess
Cons
- Coating can scratch off, reducing effectiveness
Grip Strengtheners
The harder you can grip your gun, the more accurate you’ll be. Working out your hands may not be at the top of your list of to-dos, but you’ll be amazed at just how much it helps your shooting. Try out a grip strengthener the next time you’re sitting around watching TV.
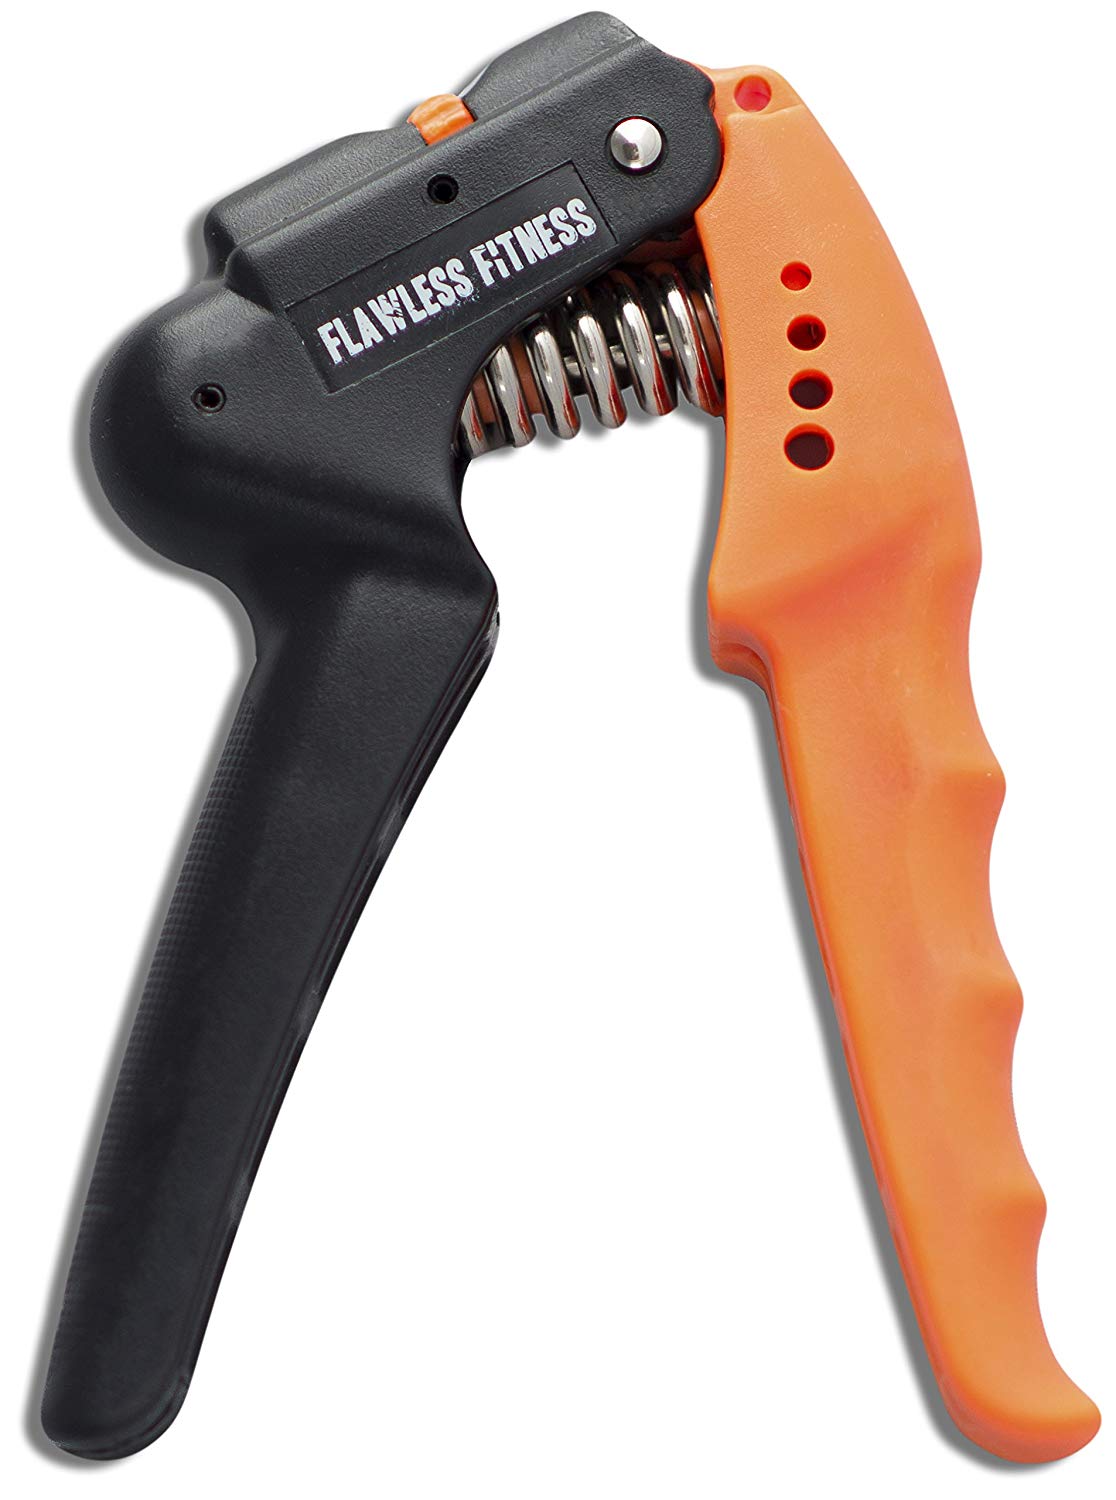
Grip Strengtheners
Pros
- Adjustable resistance
- Builds your hand strength
Cons
- Everyone will want to play with it!
Talon Grips
If you find the grip of your gun is too smooth, Talon Grips can help. They’re custom-cut adhesive grip stickers that are made for hundreds of pistol models. Slap these on and you’ll see just how much they increase your grip and keep you from slipping.
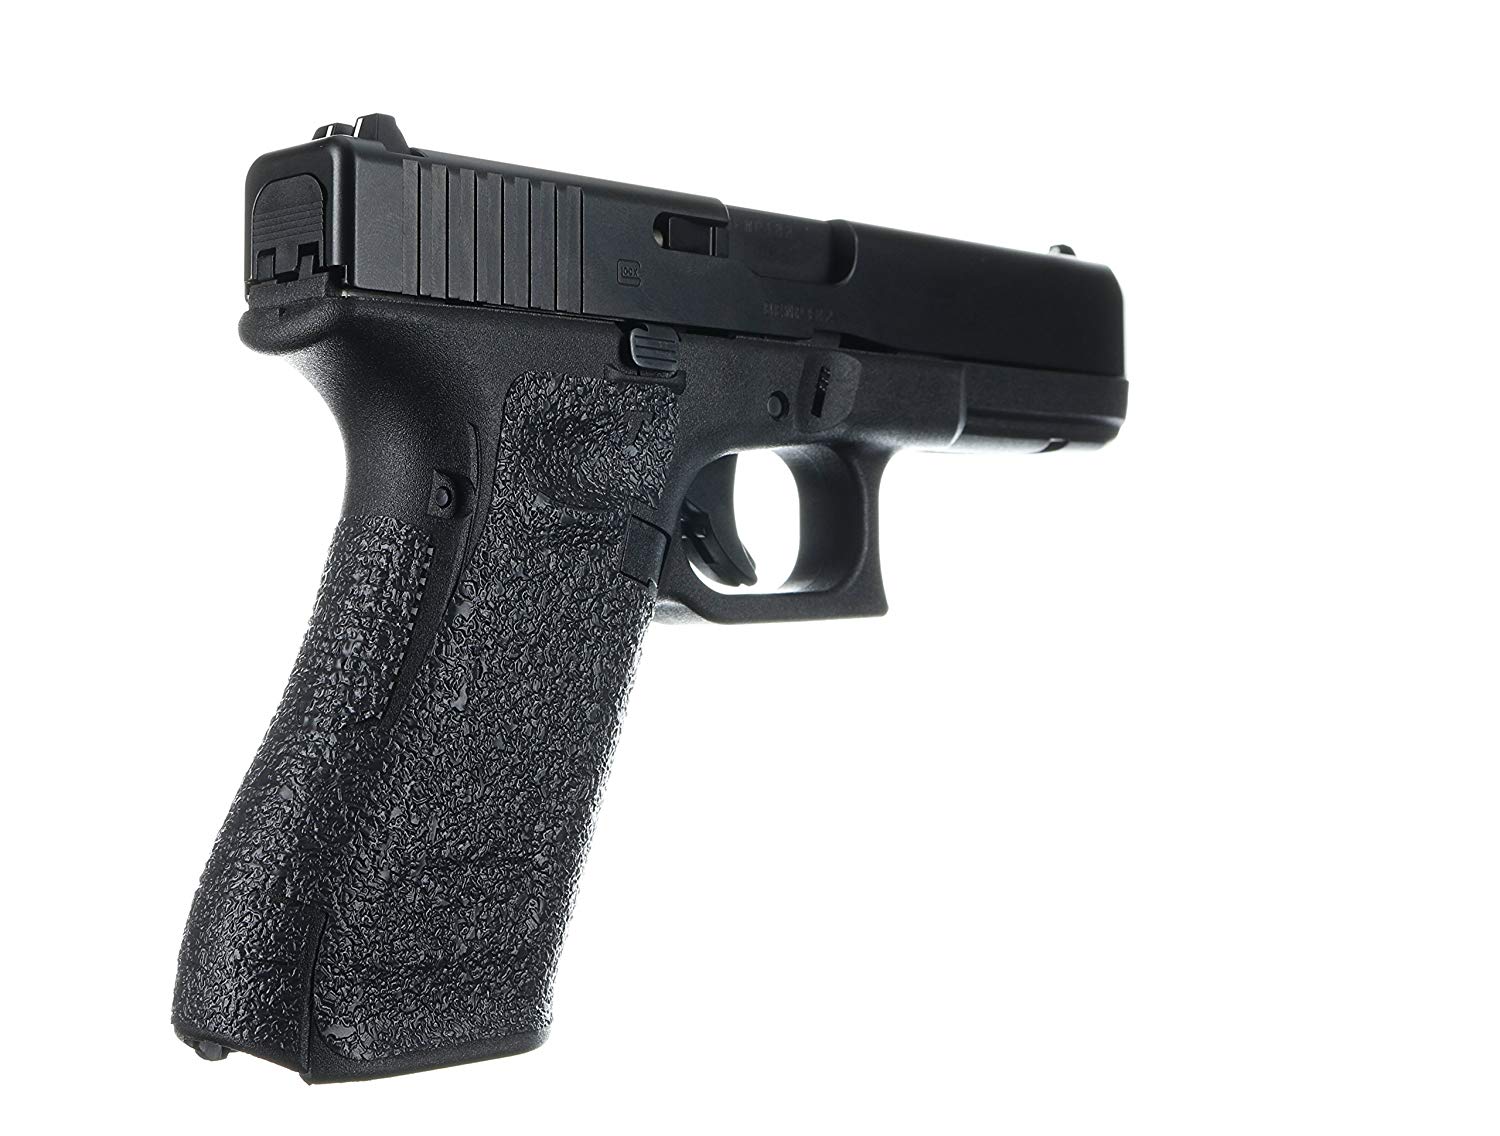
Talon Grips
Pros
- Increases your grip
- Easy to apply
Cons
- Might be rough on sensitive hands
The alternative is just to stipple your polymer grip–we don’t judge… too much.
Dry Fire Training Cards
Getting bored with the same old drills? The Dry Fire Training Cards can help you mix it up. These cards provide a variety of exercises to improve your shooting and tactical skills, starting at a beginner level and progressing.

Dry Fire Training Cards
Pros
- Helps mix up your dry-fire practice
- Drills for all levels of shooter
- Easy to use
Cons
- Doesn't teach you how to do the drill
MantisX
This is some 007-level gear, and we love it. The MantisX is a training module that mounts to your front rail and sends feedback to your phone via a Bluetooth connection. Using the app, you can see where you were hitting, where you moved, how much you moved, and what you can do to fix it.
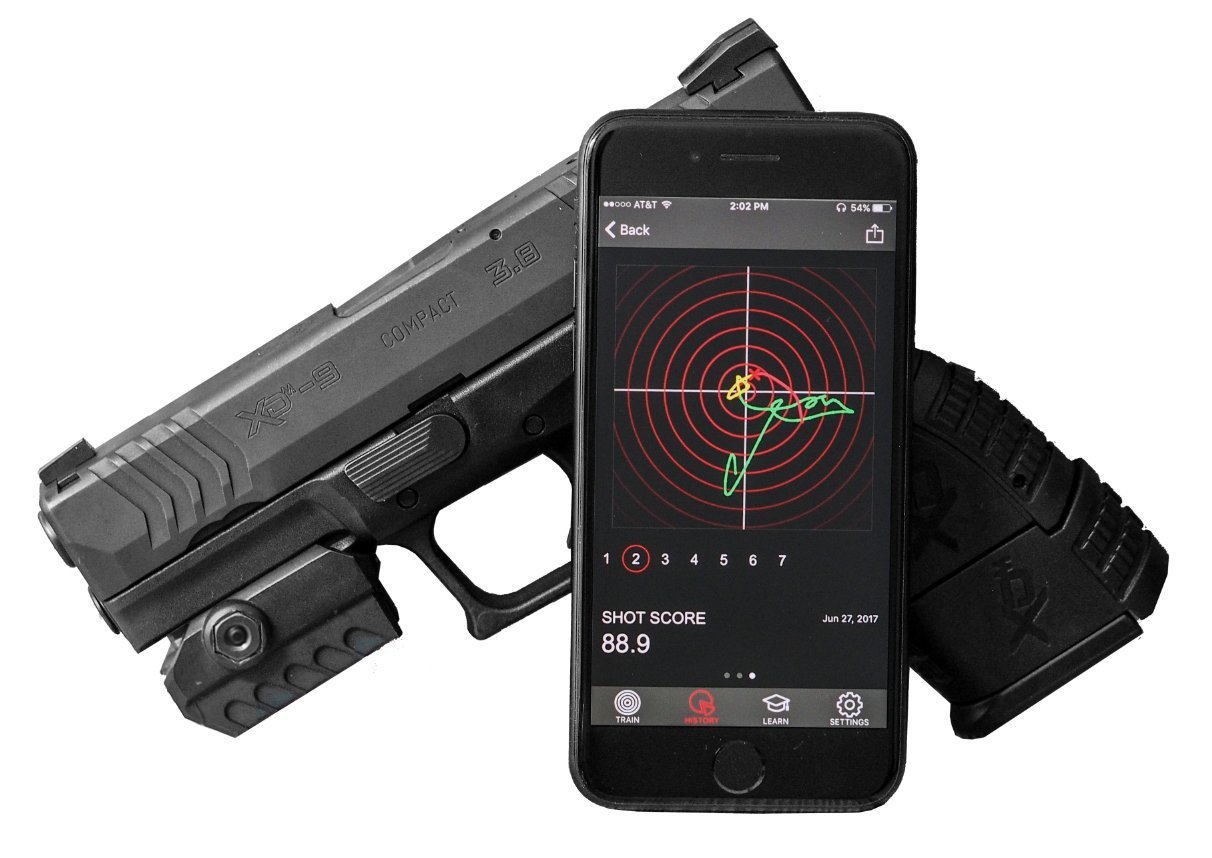
MantisX
Pros
- Bluetooth connected tracker shows your movement on your phone
- Helps you see exactly how you move when firing
- Good for dry-fire and live-fire
Cons
- Expensive
It’s can be used for dry and live fire, and we’re pretty impressed with how much this little thing improved our shooting. It’s a bit spendy, but if you’re serious about getting better, this is the way to go.
To Wrap It Up
If you’ve made it this far, you’re ready to get started on your journey to becoming a pro gunslinger, or at the very least, the steadiest shot at the local range. It’ll take dozens, maybe hundreds, of hours, but you’ll get there.
Don’t give up. You can be an amazing, accurate shooter.
What are your tips for improving accuracy? Did any of our tips help you? Let us know! We’d love to hear about it. Find your perfect beginner home defense handgun with our guide.